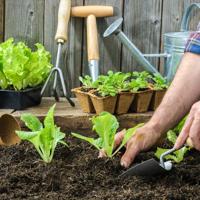
Gardening is a fulfilling pursuit, and anyone who tends to a garden knows the joy of working with well-loved tools. However, over time, even the best tools can show wear and tear, particularly in their handles. Replacing handles on garden tools is a sustainable way to extend their life and continue enjoying the garden-to-table lifestyle. In this article, we will explore why and how to replace handles, and provide you with practical tips.
Why Replace Tool Handles?
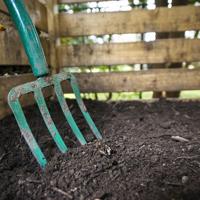
Handles on garden tools, whether they’re shovels, hoes, or rakes, endure immense pressure and stress. A cracked or broken handle can render a tool unusable, or worse, unsafe. Rather than discarding the entire tool, replacing the handle is a cost-effective and eco-friendly solution that keeps your trusted tools in good service.
Choosing the Right Replacement Handle
When selecting a replacement handle, it’s essential to match the material and size to your tool. Handles are commonly made from wood, fiberglass, or metal.
- Wood: Traditional and comfortable, wood provides a natural grip. Ash and hickory are popular choices for their strength and flexibility.
- Fiberglass: Lightweight and resistant to weathering, a fiberglass handle can be a good choice for heavy use.
- Metal: Durable and robust, although depending on the tool and use, metal might add more weight than preferred.
Ensure that the size of the handle fits the tool head securely. Most hardware stores carry a selection of handles, but a little research online might avail you more options that perfectly fit your needs.
Tools and Materials Needed
Before diving into replacing a handle, gather the necessary tools and materials. You will typically need:

- A new handle.
- A hammer and chisel.
- A saw (if cutting is required).
- Sandpaper for smoothing out rough edges.
- Varnish or oil for a wooden handle (optional, for longevity).
- A screwdriver or wrench, if the tool head is fastened with hardware.
Step-by-Step Guide to Replacing a Handle
-
Remove the Old Handle: Use a saw to cut away any broken parts still attached to the tool head. For wood handles, a chisel and hammer can help remove any remaining wood from the socket.
-
Prepare the New Handle: Before attaching, ensure a snug fit. A wooden handle might need slight whittling or sanding to fit into the tool head socket. If using fiberglass or metal handles, follow adjustment instructions accompanied by the product.
-
Attach the New Handle: For traditional socketed tools, insert the long end of the handle into the socket. It should fit snugly. You can use screws or nails to secure the attachment. In some cases, you might need epoxy or a similar adhesive for added strength.
-
Finishing Touches: Sand the handle surface to create a smooth grip. Apply varnish or tung oil if you prefer a polished look or additional protection against the elements.
-
Test the Tool: Before regular use, test the tool to ensure the new handle is securely attached and that it feels comfortable during operation.
Maintenance Tips
Regularly inspect your tool handles for signs of wear. Wooden handles can benefit from an annual application of linseed oil to prevent cracking. Keeping tools clean and stored in a dry location will ultimately extend the longevity of both tool heads and handles.
Conclusion
Replacing handles on garden tools can be an approachable and rewarding task. It may take a bit of patience, but resurrecting a beloved tool is worth the effort. By opting for handle replacement, you’re not only championing sustainability but also retaining the spirit of tools that have served you well in your garden-to-table journey.
Remember, each tool saves a story in its splinters and scratches, and a new handle simply continues the tale. Enjoy your gardening!
Note: Always consider giving a once-over to guides from trusted DIY and gardening websites, as they might offer a perfect addendum of tips and tricks to address tool-specific nuances.